To start using KODIAK Excel in Microsoft Excel, you'll need to install it first. Here is how.
Important: Users must have Service Pack 1 fyrir Microsoft Office 2007 sem og .NET Framework 3.5 for KODIAK Excel to work.
Follow this link for SP 1
and this link for .NET Framework 3.5
- If you haven't already, download KODIAK Excel
KODIAK Excel version 4.5 Supports Excel 2010 & Excel 2013. 32 and 64 bit
- Run the setup file. You need to have a local administrator rights.
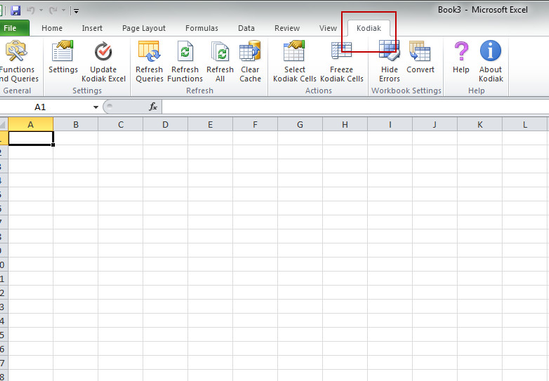
- Open Microsoft Excel. KODIAK Excel installs a new menu on the far right of Excel menu bar.
- Click Settings in the KODIAK menu. A window opens, allowing you to Add a KODIAK Server to access your KODIAK Account.
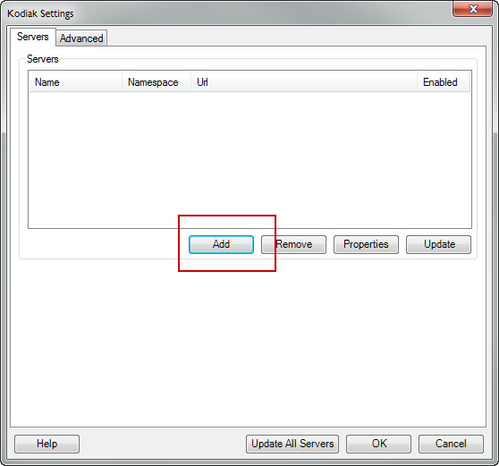
- Click on Add.
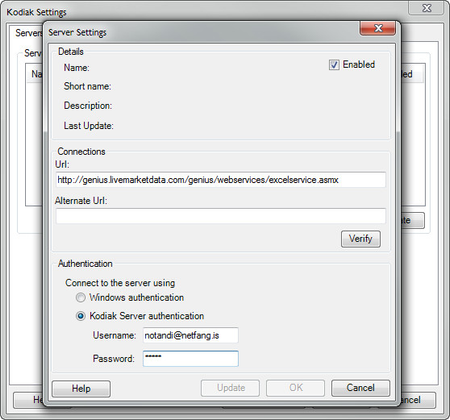
- Type in the URL for your KODIAK Server - By default, the Kodiak Server is located at http://genius.livemarketdata.com/genius/webservices/excelservice.asmx
Click Verify.
You should receive a confirmation with average response time.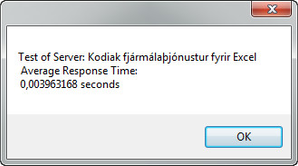
- Enter your username and password, then click Update.
- Restart Excel.
- KODIAK Excel should be ready for usage. Contact help@kodi.is if there are any issues.